In this tutorial we’re going to go through the basics of transfer learning while training 2 models, one on blur detection and one on exposure detection
Note: This tutorial requires you to have basic knowledge of machine learning concepts and terminologies
PROBLEM STATEMENT
Before embarking on any deep learning task. It is very important to clearly define the problem itself. If the programmer is not clear on the goals of the task, then decision making for the model parameters becomes difficult and vague.
The problem I’ve chosen for this tutorial is something I’ve personally experienced. This is a task faced by the video production team at any college fest. Whenever they need to create a promotional video for a huge event, they have to sort through the entire footage collected over a span of many days, often collected by many people to find good footage to use in the video. They usually rate these videos manually and use this rating later to search for good clips while editing it together.
In this pile of footage, there are a lot of videos which are objectively unusable because they’re too shaky or too blurred. The problem I’ve chosen today is to make something that can ease this sorting process by flagging unusable footage.
For the sake of simplicity, let’s define unusable as footage that is too blurred, too bright, or too dim. To form this into a more solid problem statement. We now need an algorithm that classifies a video into these categories. Divide and Conquer is a very well known paradigm in Deep Learning. So we’ll split this problem into 2 atomic sets. One, is to classify the blurriness of a frame The second, is to classify the exposure of a frame We will then average the results for the entire video and rate the footage.
Now that we have our problem statement. Let’s begin with the tutorial.
BACKGROUND
For this tutorial we would be using the Pytorch frameowrk to train and test our deep learning models. We are going to employ the transfer learning approach as the training set we have is pretty small.
PyTorch

Pytorch is one of the most popular libraries for implementing deep learning algorithms. It is based off of Facebook AI Research (FAIR) lab’s library called Torch. Its doctrine is to be a staple equivalent of NumPy for general mathematical calculations in the area of Deep Learning (DL). Please install PyTorch on your machine according to the instructions from here.
Transfer Learning
As the name suggests, the method of transfer learning uses a model’s knowledge gained from solving one task, in a different but related task. In our use-case, we use DL models trained on the ImageNet database to classify pictures from a 1000 categories, for classification of blurred and overexposed images in a video. In this technique, we take the pre-trained model, and add only a few classification layers to the end before training it for a few epochs. The idea is to use the model’s existing knowledge of edges and lighting to detect blurred images, or overexposed images. This technique is particularly useful when computation power and time for training are limited.
DATASET
For the blur detection task. We will be using the CERTH Image Blur dataset. Originally, this dataset contained more classes, but we will stick to the classfication between natural blur and non-blurred images. This is a good sized dataset with over a 1000 images in total.
For the exposure task. We would be using a dataset of my own. This is simply a collection of clips from college fests that have been sorted manually. Drive link to dataset (will upload soon). I have extracted about 1200 images from these videos to create a dataset with 3 classes. Underexposed, Overexposed, and Good frames.
Tutorial
Exposure Task
Let’s start by setting some general variables and imports. The full code is available in this colab notebook.
import torch

DATA_DIR = '/content/drive/MyDrive/ExposureDataset'
SAVE_PATH = DATA_DIR+'/Exposure_model.pth'
device = torch.device("cuda:0" if torch.cuda.is_available() else "cpu")
The last line connected the GPU to the variables device. This variable can be used to put calculations in our GPU, which will speed up training. Next, we need a DataLoader. This is how we will be loading every image of our dataset. My dataset directory contains 2 folders (Train/Test) which further contain one folder per image class. So I’ve implemented the following DataLoader which returns an (image,label) where label is understood from the image’s path.
import os
import glob
from skimage import io
from torch.utils.data import Dataset
from torchvision import transforms
import pandas as pd

class ImageFolderDataset(Dataset):
    def __init__(self, root_dir, transform=None):
        self.root_dir  = root_dir
        self.file_list = glob.glob(self.root_dir+'/**_images/*')
        self.transform = transform

    def __len__(self):
        return len(self.file_list)

    def __getitem__(self, idx):
        if torch.is_tensor(idx):
            idx = idx.tolist()

        # Get file
        filename = self.file_list[idx]

        # Assign label
        if "Overexposed" in filename:
            label = 2
        elif "Underexposed" in filename:
            label = 1
        else:
            label = 0

        # Read image
        sample = io.imread(filename)


        # Transforamtion | Augmentation
        if self.transform:
            sample = self.transform(sample)

        return (sample, label)
Now let’s initialise the DataLoaders.
import PIL

img_transform ={
    'train':
        transforms.Compose([
        transforms.ToPILImage(),
        transforms.ColorJitter(saturation=0.2, hue=0.2),
        transforms.RandomHorizontalFlip(),
        transforms.RandomVerticalFlip(),
        transforms.RandomResizedCrop(224),
        transforms.ToTensor(),
        transforms.Normalize([0.485, 0.456, 0.406], [0.229, 0.224, 0.225])
      ]),
      'val':
        transforms.Compose([
        transforms.ToPILImage(),
        transforms.Resize(256),
        transforms.CenterCrop((224)),
        transforms.ToTensor(),
        transforms.Normalize([0.485, 0.456, 0.406], [0.229, 0.224, 0.225])
      ]),
}


dataset = ImageFolderDataset(os.path.join(DATA_DIR,'Train'), img_transform['train'])
trainloader = torch.utils.data.DataLoader(dataset, batch_size=4,shuffle=True, num_workers=4)

test_dataset = ImageFolderDataset(os.path.join(DATA_DIR,'Test'), img_transform['val'])
testloader = torch.utils.data.DataLoader(test_dataset, batch_size=4,shuffle=True, num_workers=4)
For our Image Augmentation, we will be adding a random flips, and take a random crop of the image to train our model. This will virtually increase the size of our dataset by many folds. For the validation set, we will only resize and take a center crop (basically remove all random factors) to keep the score deterministic. The normalization parameters have been decided according to the torchvision library instructions (since models were pre-trained that way).
Now we move on to defining our model:
import torchvision.models as models
import torch.nn as nn
import torch.nn.functional as F
import torch.optim as optim

from torch.optim.lr_scheduler import MultiplicativeLR

model = models.resnext50_32x4d(pretrained=True)
modelname = model.__class__.__name__
model = nn.Sequential(model, nn.ReLU(), nn.Dropout(), nn.Linear(1000,3))
model = model.to(device)

criterion = nn.CrossEntropyLoss()
optimizer = optim.SGD(model.parameters(), lr=0.002, momentum=0.9)
scheduler = MultiplicativeLR(optimizer, lr_lambda=lambda epoch: 0.99)
Here most lines are self explanatory. We use the ResNext50 model’s smaller 32x4 pre-trained variant. We add a 500 neuron ReLu layer followed by a dropout and finally a decision layer. We use cross entropy loss, which is common for such classification tasks. Our optimizer is Stochastic Gradient Descent, but you may choose any optimizer. I’ve also used the Multplicative lr scheduler, but that is optional.
Now, we move on to the training.
import time

acc = prev = 0

with open(DATA_DIR+'/logs.txt','a') as log_file:
    log_file.write("Training for "+modelname+" started at: "+str(time.time())+"s\n")

st = time.time()
for epoch in range(20):
    train_loss = 0
    total = 0
    correct = 0

    for i, data in enumerate(trainloader, 0):
        model.train()
        inputs, labels = data
        inputs, labels = inputs.to(device), labels.to(device)

        # zero the parameter gradients
        optimizer.zero_grad()

        # forward + backward + optimize
        outputs = model(inputs)
        loss = criterion(outputs, labels)
        loss.backward()
        optimizer.step()

        # Stats
        train_loss = loss.item()
        _, out = torch.max(outputs.data, 1)
        total += labels.size(0)
        correct += (out  == labels).sum().item()

        if i%50 == 0:
            print('-',end="")
    print("")

    # Training accuracy for this epoch
    train_acc = (100 * correct / total)

    # Validation
    model.eval()
    correct = 0
    total = 0
    with torch.no_grad():
        for data in testloader:
            images, labels = data
            images, labels = images.to(device), labels.to(device)
            outputs = model(images)

            _, predicted = torch.max(outputs.data, 1)
            total += labels.size(0)
            correct += (predicted == labels).sum().item()

    val_acc = (100 * correct / total)
    if val_acc > prev:
        torch.save(model.state_dict(), SAVE_PATH)
        prev = val_acc

    # LR SCHED
    scheduler.step()

    # Time
    end = time.time()
    interval = end-st
    st = end

    # All stats
    stmnt = "Epoch {:.5f}: Acc={:5f}, Loss={:5f}, Val={:.5f} : {:.5f}s".format(epoch, train_acc, train_loss, val_acc, interval)
    print(stmnt)
    with open(DATA_DIR+'/logs.txt','a') as log_file:
        log_file.write(stmnt+'\n')

print('Finished Training')
You may vary the number of epochs according to your needs. I ran the above code, and got upto a 99% validation accuracy before the model started overfitting. This code automatically saves the best model. So now we simply have to pick up this model and use it.
Blur Task
Almost the same as above, but instead of 3 classes, we have only 2. The model choice and other parameters can be different here. For example, my dataloader was different since CERTH dataset was provided differently. The code for this task is here
import os
import glob
from skimage import io
from torch.utils.data import Dataset
from torchvision import transforms
import pandas as pd

class ImageFolderDataset(Dataset):
    def __init__(self, csv_file, root_dir, transform=None):
        self.root_dir  = root_dir
        self.file_list = pd.read_csv(csv_file)
        self.transform = transform

    def __len__(self):
        return len(self.file_list)

    def __getitem__(self, idx):
        if torch.is_tensor(idx):
            idx = idx.tolist()

        label = self.file_list.iloc[idx,1]
        try:
            img_path = os.path.join(self.root_dir,self.file_list.iloc[idx,0]+'.jpg')
            image    = io.imread(img_path)
        except:
            img_path = os.path.join(self.root_dir,self.file_list.iloc[idx,0]+'.JPG')
            image    = io.imread(img_path)

        sample = image
        if self.transform:
            sample = self.transform(image)
        return (sample, label)
This loader utilizes the given .csv file to read the images and doesn’t have to use glob for searching it itself. The rest of the code is the same in terms of model, transforms etc, with the only change that the decision layer now has only neurons. So now we have both the models ready for Testing.
Evaluation
To make use of our models in videos, I defined the following function
from moviepy.editor import VideoFileClip
from torchvision import transforms

img_res = transforms.Compose([
        transforms.ToPILImage(),
        transforms.Resize(256),
        transforms.CenterCrop((224)),
        transforms.ToTensor(),
        transforms.Normalize([0.485, 0.456, 0.406], [0.229, 0.224, 0.225])

def add_to_labels(labels, outputs):
    _, out = torch.max(outputs.data, 1)
    for values in out:
        labels[values] += 1

def evaluate_model_video(model, transform, filename, classes, input_size):
    # Freeze
    model.to(device)
    model.eval()

    # Load video
    clip = VideoFileClip(filename)
    frames = clip.iter_frames()
    num_frames = int(clip.fps*clip.duration)

    # Input size of the form = (b, c, w, h)
    batch_size = input_size[0]
    curr_list = torch.empty(input_size, device=device)
    labels = torch.zeros(len(classes), device=device)
    counter = 1
    for frame in frames:
        # Add image to list
        if transform:
            frame = transform(frame)
        curr_list[(counter-1) % batch_size] = torch.Tensor(frame)

        # After a full batch
        if counter % batch_size == 0:
            outputs = model(curr_list)
            add_to_labels(labels, outputs)

        # Count frames
        counter += 1

    if (counter-1) % batch_size != 0:
        outputs = model(curr_list)
        add_to_labels(labels, outputs[:(counter-1) % batch_size])

    labels = labels*100/labels.sum()
    for i in range(0,len(classes)):
        print("{s}: {:3.2f}%".format(classes[i], labels[i]), end=", ")
    print("\n")

    return labels
Now we can simply call this function in a loop and pass it the appropriate model and parameters, to make the predictions.
Results
I was able to achieve an 83% validation accuracy on the blur dataset and 99% validation accuracy on the exposure dataset. Using these models, I tested it on some videos. The notebook can be found here .
Here are some tests I ran on sample footage from outside the training/validation dataset. Do note that this score mentioned is an average calculated over every frame as described in evaluate_model_video()
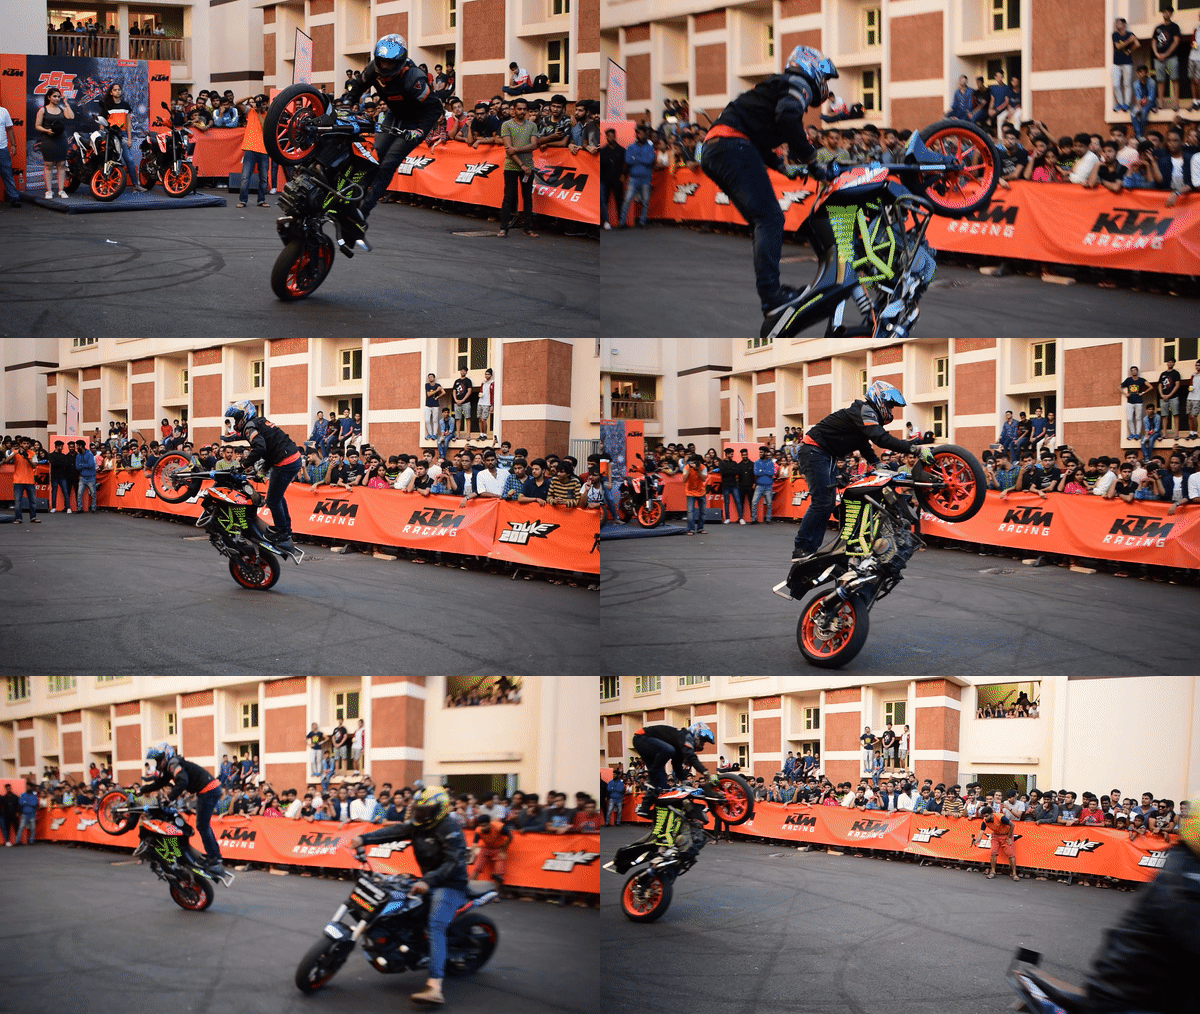
Example video 1: A bike stuntman doing stunts in front of a crowd. The image is very well exposed. However, the cameraman tries to change angle mid-way and this causes some shakyness during the scene. The video is still quite usable since the main part of action was unaffected.

Video Evaluated : /content/drive/MyDrive/ExposureDataset/Test/Extra/3 wheelie.MOV
Good: 100.00%, Underexposed: 0.00%, Overexposed: 0.00%
Good: 67.30%, Blurry: 32.70%
Our predictions match with our observation! While its true that the model’s prediction of 100% good exposure is a little bit too much, at least it shows that our model learnt exactly what we wanted it to. For bluriness as well, a 30% blur sounds just about right for the shaky-ness of the clip.
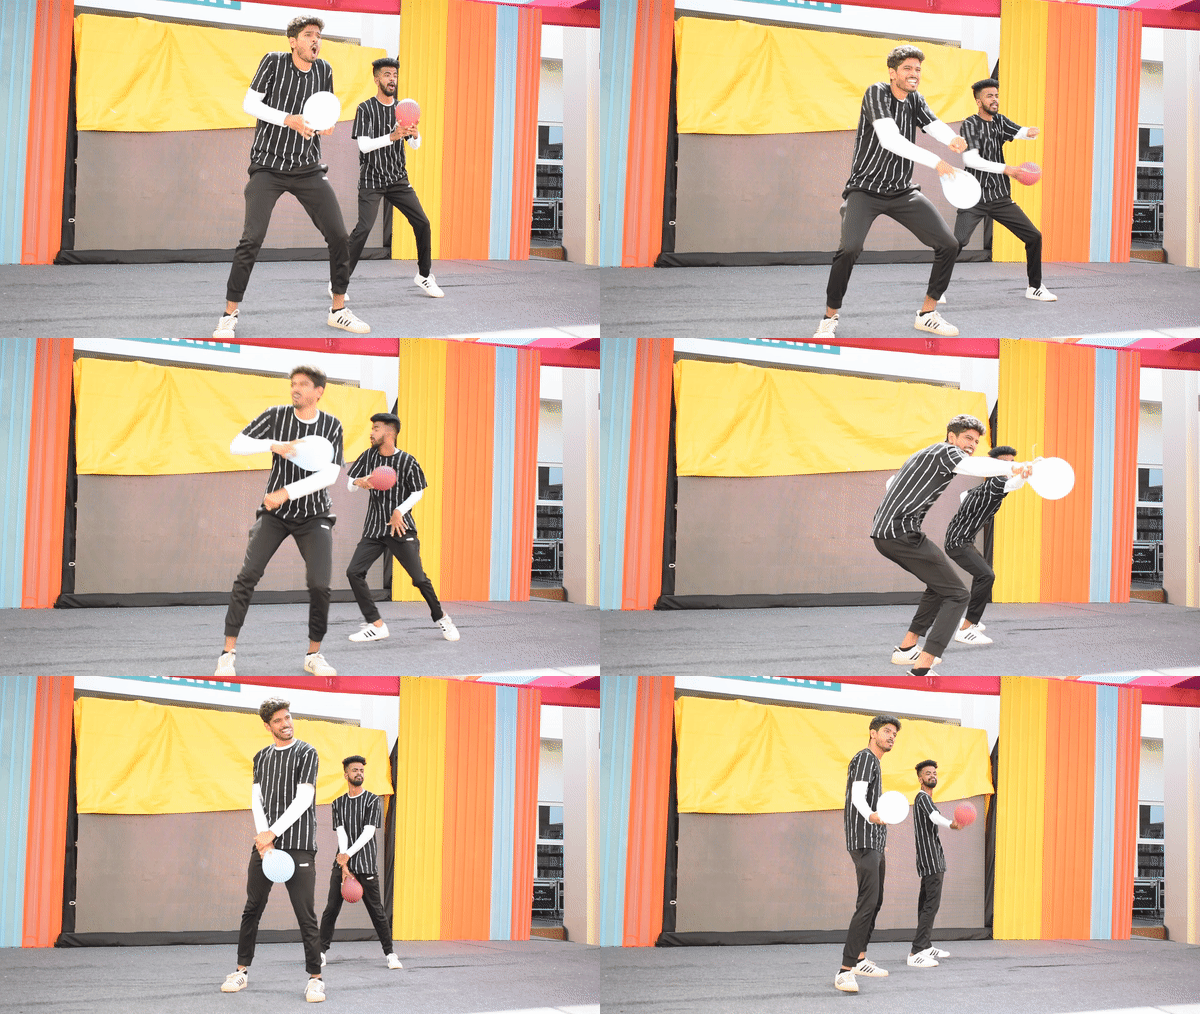
Example video 2: This one is from a dance video. From the very first look, you can tell that the image is terribly overexposed. This sometimes happens when the camera man does not remember to change their camera settings while the sun grows brighter during the day.

Video Evaluated : /content/drive/MyDrive/ExposureDataset/Test/Extra/3 mime clothes.MOV
Good: 0.00%, Underexposed: 0.00%, Overexposed: 100.00%
Good: 100.00%, Blurry: 0.00%
Again, the exposure prediction was on point, albeit a bit too extreme. The blur prediction is on the right track as well, since the frame is relatively stable, and there are not parts of the main subject out of focus. Both models overexaggerate their predictions a little bit. But for our limited training, the results look very good.
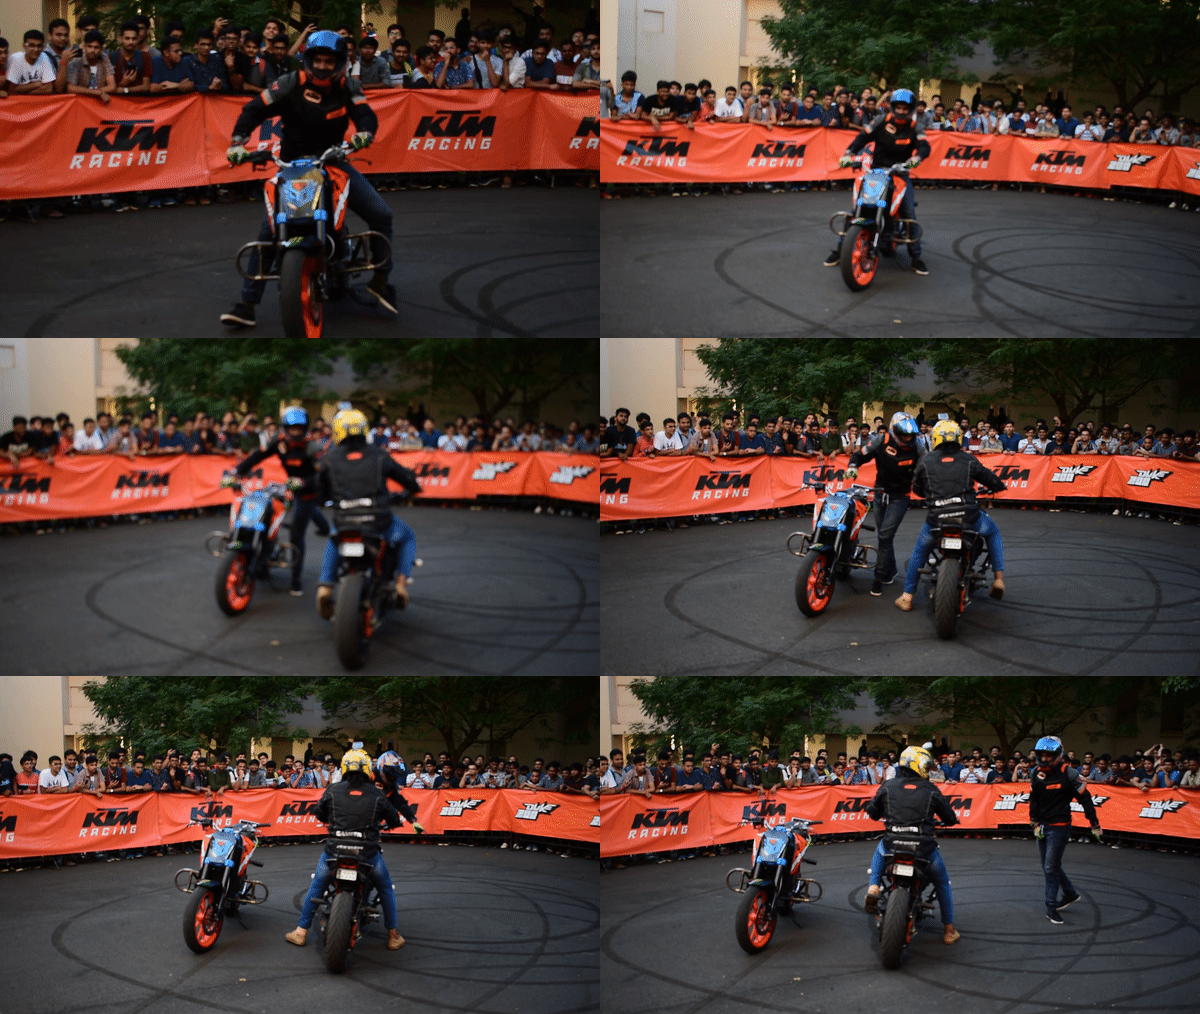
Example video 3: This is another bike stunts video (yes I had tons of them). This time however, while there is enough light in the frame, it is terribly out of focus, hence blurry.

Video Evaluated : /content/drive/MyDrive/ExposureDataset/Test/Extra/1 full soft.MOV
Good: 100.00%, Underexposed: 0.00%, Overexposed: 0.00%,
Good: 31.75%, Blurry: 68.25%,
And our predictions are quite fair! The blur score is actually really accuracte as more than half the video is out of focus or shaky (may not be as apparent in this gif as the frame rate is lowered). Again however, I would say that the exposure prediction is a little exaggerated. A 90% would have been better because the initial few frames seemed underexposed.
Finally, both our models are performing fair on their required tasks. We can now write scripts in the future to utilize this AI algorithm to judge a large batch of videos!
